
Foreword
Hello dear readers,
you may ask, what is this? The answer would be “a summary of my personal experiences playing with AI to generate images, so far”. I want to share my experiences, discoveries I made and little tricks I came upon. My main target is to get people new to the topic up to speed, and maybe some old veterans can also learn a thing or two.
you may ask, what is this? The answer would be “a summary of my personal experiences playing with AI to generate images, so far”. I want to share my experiences, discoveries I made and little tricks I came upon. My main target is to get people new to the topic up to speed, and maybe some old veterans can also learn a thing or two.
That said, English is only my second language. If you see a mistake or a passage of text that is just weird, please tell me and I will correct it. You are also invited to share your own experiences and so on.
The Content
Chapter 1 - What you can see
Lets start with a simple, but powerful one: If you get an idea for an image, just stop and think a moment before you prompt. Why? Lets say you want Fluttershy on a bed. Easy!
pony, feral pony, my little pony, close up, fluttershy, indoors, bedroom, on bed, lying on side. Boom! done. And you have a wardrobe between the bed and the wall where realistically is not enough space to fit one. Bummer. But why? The problem here is bedroom, believe it or not. While training a model, pictures of bedrooms are tagged as such and the AI learns the concept of them. What have most bedroom pictures in them? A night stand, wardrobes, maybe some pictures on the wall, etc. You get the idea. Nice of the AI to add it automatically, but if we want a picture of just the bed with a pony on it, as in only part of a room, the AI will still try to add these things. We have two options now to avoid this. We could leave bedroom out and add to the prompt stuff like: wooden wall, window with curtains, pictures OR we prompt stuff out we don’t want as a negative: wardrobe, nightstand with a high enough value.This is one example of course. Lets say you want to prompt a character only visible from behind. Some one like
solo, pony, feral pony, bat pony, rear view, grey fur, spread bat wings, yellow eyes, blue mane. This will most likely result in a bat pony seen at an angle from behind or a pony looking over their shoulder. This time yellow eyes are the culprit. The AI will always try to put into a pic what you prompt. If you want the pony to look away from the viewer, you can add looking away with a high value, but it would be way easier to just leave the eyes out.And this is what I mean. Put only stuff in the prompt of what you wish to be in the picture and mind “implications”.
xy-room and so on always result in some implications for example. So stop a moment and think what truly should be visible in your scenario. And now the curve ball and my favorite example: castle bedroomIf you have been paying attention you know what could happen here. We get a luxurious room with stone wall, a big window and outside of it? A castle! Go figure. AI will generate what you give it and
castle was definitely in there. luxurious bedroom would be a good alternative to use here for example. A trick that sometimes seems to work, depending on the model, is using “-” or “_”. Like castle_bedroom. It no cure it all but it helps. Same principle, different example for this: Lets say you want Sweetie Belle without her cutie mark. You put cutie mark in the negative but is still doesn’t work? The term blank flank is an option but you probably guessed it: cutiemark, cutie_mark, cutie-mark. To give the curve ball a curve ball, different models used different tags in training. A “Applejack” or “Apple Jack” kind of scenario. Good luck finding that out.Chapter 2 - The Power of Paint
In chapter 1 we talked about prompting, but sometimes a prompt can get you only so far. AI can’t get new concepts without being retrained, so we as end users have to make do until a new version is out that knows the concept. Like a character from a recent anime. Sure, Loras as little DLCs help us over until PonyV8 - Electric Boogaloo comes out and can generate the whole universe at once, but using too much of them is like Skyrim modding. It gets even more unstable really fast. So normally you want as less Loras as possible. Inpainting is a really powerful tool that not many people seem to use, so here a quick example to make my point:


The picture you see on the left? I turned something like that into the right one. You still don’t need any artistic skills, just a general idea of what you want. I used a simple “technique” called blobbing. And it is as dumb as it sounds. Just open Paint (or any other digital drawing application), set it to the resolution you want and just drop in simple blobs until they “loosely” resemble your idea. Then write the matching prompt and denoise your “sketch” at 0.75 to like 0.9 (so its nearly gone). It will then work as a “guidance” for the AI.


I used the same technique here, just I drew into the generated image, then masked the area out and let it redraw only that part. This was at one point, only a one pony picture. (1 cookie if you can tell which one was the original.)
Interlude
Something you need to be aware of in general is prompt “bleed”. Let say you want a picture with Twilight Sparkle taking a sun bath. Most likely the result will be a dusk picture. The problem is
Twilight. As in chapter 1 mentioned, the AI will take what is there. It takes the Twilight as base to make a dusk setting, like the castle example. Its a general issue most models have. Fern, from the popular anime, is a good second example. If I generate her, I also get a lot of fern, the plant. (Frieren and Fern are actually German words and mean “freezing” and “distance” respectively. Japanese love to take german words in their fantasy writing.)This can be countered by adding the daytime we don’t want in the negative or
fern plant in the other case. Just another thing to look out for in general.Chapter 3 - Fantasy is Dead
So far, I talked about having a general idea, or that you have a picture in mind. What if you don’t? What if you just have the basic need of: “Need cute pone pictures”? This chapter is for you when you don’t get why grown men get exited over some sticks on the internet. Jokes aside, sometimes we have just a vague inkling or are just bored. That’s what the cfg-scale is for. Most models give users a range like 3-7 but what does this actually do? Its basically just a scale how “obedient” the AI is to your prompt. The higher the scale, the less it does on its own. Think like the bleed thing I talked about, just on purpose. This also means part of your prompt will be ignored more likely. I bet you generated a pony before and said
yellow mane, blue eyes and got the exact opposite. That could be a too low cfg. I personally consider 3 the lowest, regardless of model. The highest I ever used was 11 back in the SD1.5 days. For SDXL (that includes pony, illustrious, Noob, etc…) it is around 7 to 8. While it can go up to 20, you will never be happy with those results, trust me bro.So now that we established that we are unimaginative bellends, can we still make pictures? Yes, that what AI is for after all. You want to go with a very simple prompt for this, like
solo, pony, feral pony, unicorn, twilight sparkle, lying in tall grass and a cfg at 3 (don’t forget the usual quality words). And hit run. That’s it. This is the monkey with typewriter approach to generation. Generate random number of pictures, eventually one will be Hamlet.For the second one, I left the grass part out. But as you can see, we still get pictures with absolute minimal input and let the computer do most of the work. (Or maybe even more as it already does.)
I personally only use this approach if I am absolutely out of ideas. Sometimes I struck gold, sometimes something in the results gives me an idea and I prompt with more purpose (4-6 cfg). But this is what most AI haters think is to “good AI pictures”. The downside of this they are somewhat right. These picture will most likely be bland and simple. But, what if could spice this up? What if… Lora? And here comes the fun part; Throw Loras for special effects at this gives often very interesting results.


Chapter 4 - Fusion
Lets go from simple to complicated. Or to be more precise, detailed. Detailed backgrounds are difficult in a sense that AI has no concept of depth, space and consistency. That’s why you have two beds in bedroom, or five hundred lamps and so on. The AI doesn’t remember what it put in, it just guesses what should be there. And its biggest enemy? Characters. They disrupt the generation and it starts new between the legs, or the right side looks different from the left cause the character splits the picture in half. That’s why most backgrounds “suck” in generated images. But there is a way around it, and all you need is a free image editing tool (Gimp, Krita, Photopea, etc…) and 10-20 minutes extra of your time.
And now hold onto your horses because the trick is; We generate background and character separately. I know, mind blown, take a minute to come back into reality, I will wait. But jokes aside, its not as hard as it sounds. We need 3 prompts for this little stunt. One for the character, one for the background and one that is the combination of the two. Then we get to generating. For the character, just look for a fitting angle and that it has the pose you want. We ignore the background here. (Also lighting and so on.)
If we have what we want, we generate the background. Prompts like
no human, scenery, wide shot are our friends here. Here you set the mood and tone. Night time, day time, stuff like that. AI is good at just generating background, since there is no interruption by unshapely creatures.Now come the human part, aka you. If we have both pictures we want to “marry”, we open the character in our editing tool of choice and use the lasso tool. Just cut her out like Sunset did Twilight in the Equestria Girls move. It doesn’t need to be pixel perfect or anything. Then open the background and slap that bad boy in. Play a little with size, angle, lighting and stuff if you want to (and know how), then save the image and your part is done.
Remember chapter 2? Well we do that now, just with a really low denoise around 0.3 to 0.4 this time and our combined third prompt. Inpainting will clean up our sloppy mess and make it fit together. And if not on the first try, do it again, like at 0.2 to 0.3 this time. And then, we have a picture with detailed background (that makes sense) and a character or two in it. Or TLDR: Photobashing is still a thing.


Chapter 5 - Let it be Light_
Lighting can have a huge impact on any given scene, regardless if it is film or picture. This is also true for AI generated images. There are various forms of lighting, but I will keep it down to the most used ones. I learned about this stuff when I started to get into AI and it can help to make a picture better. But what do I mean by “lighting”? imagine you want to take a picture of your friends at an outing. If they are facing the sun, they are properly lighted, but will squint their eyes to shield them. If they face away, chanced are there isn’t enough light for a good picture, especially with a smartphone camera. So you stand them in an angle to the sun, so they don’t look directly at the sun, but get enough light to make the picture. And now remember, we can control the sun in this case. And we do it by the right prompts:
natural lightingUses sunlight or ambient light from the environment.
dramatic lightingCreates strong contrast between light and shadow.
cinematic lightingMimics film lighting with controlled shadows and highlights.
soft lightingDiffused and even light with gentle shadows.
hard lightingSharp, strong light that creates crisp shadows.
rim lightingCreates a border of light around edges or persons.
volumetric lightingAlso known as light rays or god rays.
Thanks to ChatGPT for the short descriptions of the different techniques
There are more, of course, but these are the most common ones. If you want an outdoor scene, go for natural. If you have an action scene, dramatic or cinematic, and so on. The right light makes a big difference and the AI knows these terms.
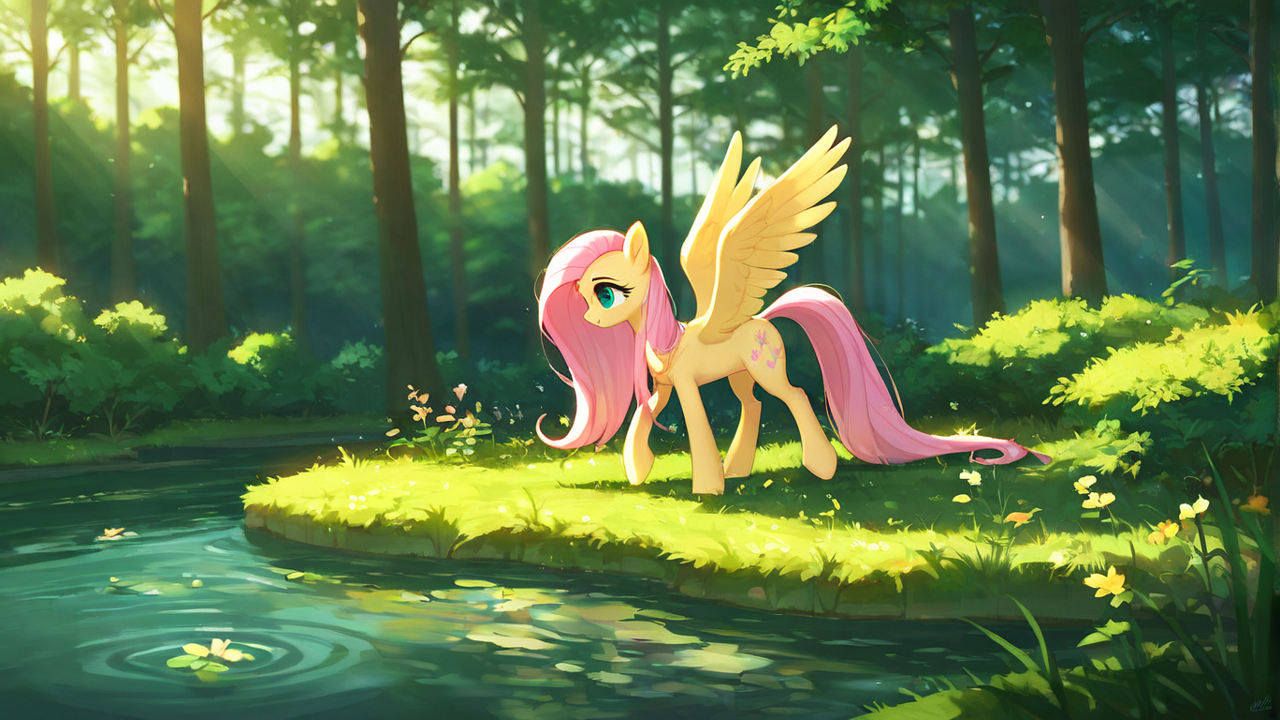
You can go further into detail. Lets say we have a pony walking through a forest on a warm summer day. Our prompt could look like this:
You can go further into detail. Lets say we have a pony walking through a forest on a warm summer day. Our prompt could look like this:
solo, pony, feral pony, full body, unicorn, rarity, walking towards viewer, outdoors, forest, tall grass, natural lighting, volumetric lighting, dappled sunlight, thick leaf canopyChapter 6 - Designing a prompt_
We have come so far, learned some basic techniques and even some “pro haxxor moves”. Now its time to talk about the absolute basics. There are people making money with “prompt design” and I never heard anything more silly. Its not a science, just basic logic and a little bit of knowledge how AI works. Here is a basic graphic how it works in our case. (Source @Witty-Designer7316)
The first info we need is the base model we are using. Lets say our model is named “Prefect Pony XL”. The name gives it away but the description on civitai also states it is based on ponyv6. So it should take the same “quality words” as ponyv6. And after a quick check on the sample images, yes it does. So now we can putting our prompt together:
The most important rule is, the more important something is, the further at the beginning of the prompt it should be. That’s why quality words come first. So, depending on the model our first words should look something like this:
score_9, score_8_up, score_7_up, masterpiece, best quality, amazing qualityThe next thing should be what we want. Lets say we want Fluttershy with spread wings standing in a lake.
So something like:
So something like:
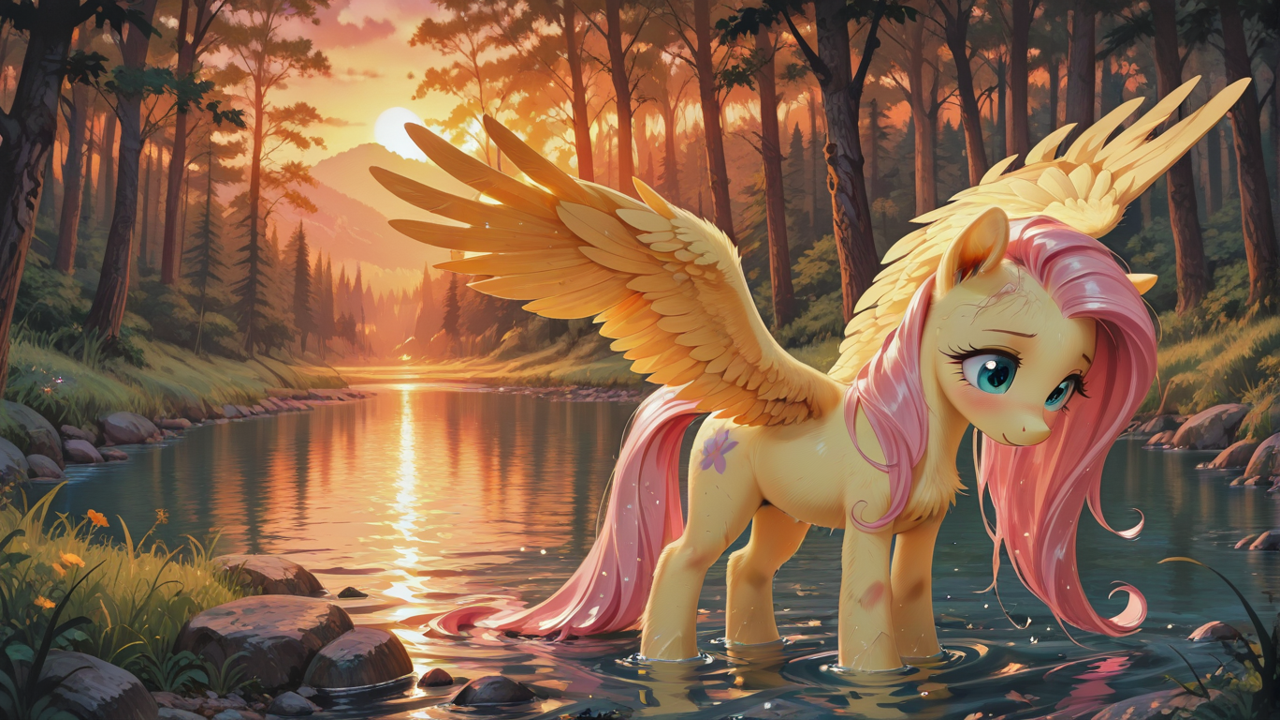
solo, pony, feral pony, full body, pegasus, Fluttershy, spread wings, partly submerged, wet furNow the background:
outdoors, forest, lake, tall grass, flowersAnd at last, additional stuff like lighting and stuff:
natural lighting, dappled sunlight, duskThis gives us a final prompt:
score_9, score_8_up, score_7_up, masterpiece, best quality, amazing quality, solo, pony, feral pony, full body, pegasus, Fluttershy, spread wings, partly submerged, wet fur, outdoors, forest, lake, tall grass, flowers, natural lighting, dappled sunlight, duskBut we are not done. Now we come to weights! They make it possible to make parts of the prompt more important than others, to control how much of what we want. The program I use takes “+” and “-” as weights, so for me it would look something like this:
score_9, score_8_up, score_7_up, masterpiece, best quality, amazing quality, solo, pony, feral pony, (full body)-, pegasus, Fluttershy, spread wings, partly submerged, (wet fur)+, outdoors, forest, lake, tall grass, (flowers)-, natural lighting, (dappled sunlight, dusk)++Most others programs use a syntax like this:
score_9, score_8_up, score_7_up, masterpiece, best quality, amazing quality, solo, pony, feral pony, (full body:0.8), pegasus, Fluttershy, spread wings, partly submerged, (wet fur:1.2), outdoors, forest, lake, tall grass, (flowers:0.8), natural lighting, (dappled sunlight:1.5), (dusk:1.5)BUT WAIT, THERE IS MORE!
This is of course only 50% of what we need. We still need to tell the AI what we don’t want. So first we check the base model page again and get the default negative prompt quality words:
score_4,score_3,score_2,score_1Then the model site of our merge Perfect Pony XL:
ugly, worst quality, bad quality, jpeg artifactsAnd normally that would be enough, but I will add a few personal favorite of mine today:
long body, realistic, monochrome, greyscale, artist name, signature, watermarkGiving us the final negative prompt:
score_4,score_3,score_2,score_1, ugly, worst quality, bad quality, jpeg artifacts, long body, realistic, monochrome, greyscale, artist name, signature, watermarkWe could add weights here too, but we should try first for now (I use tpony here, another ponyv6 based model):
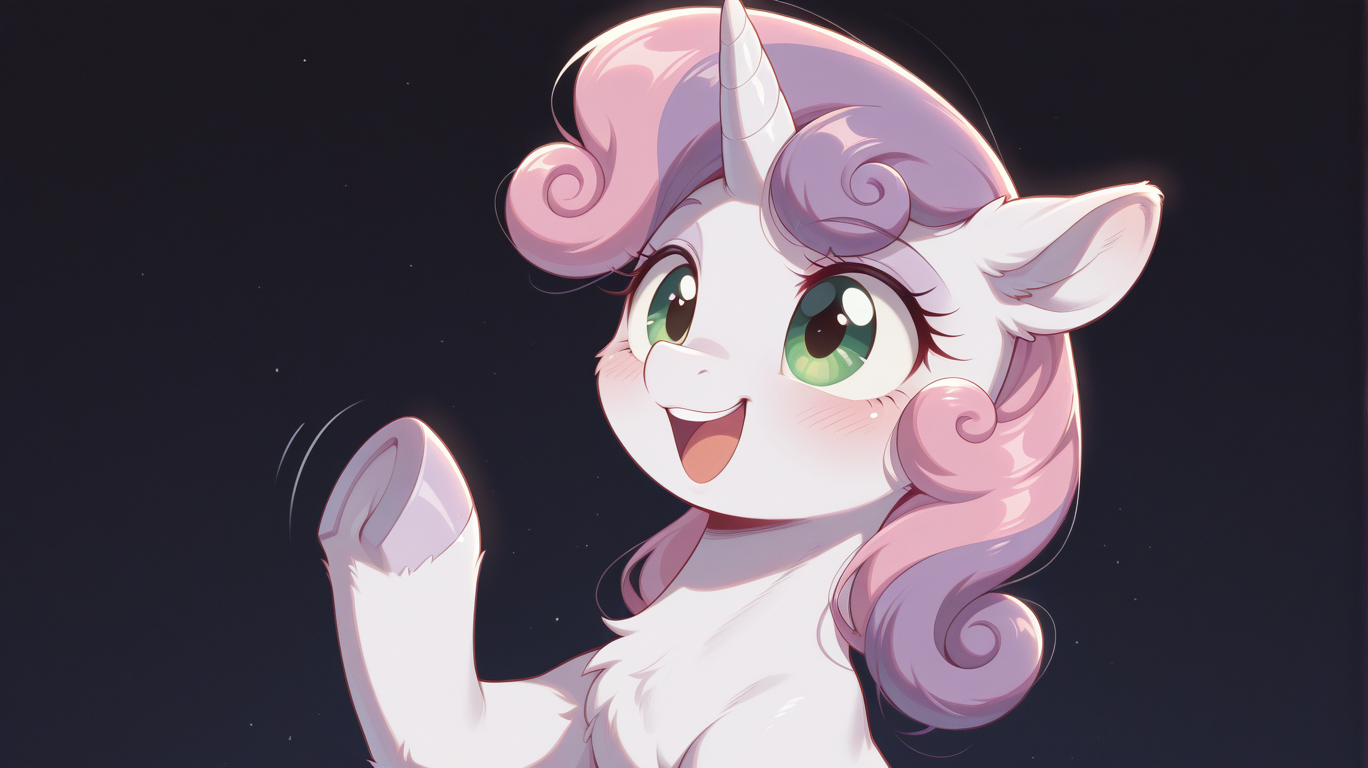
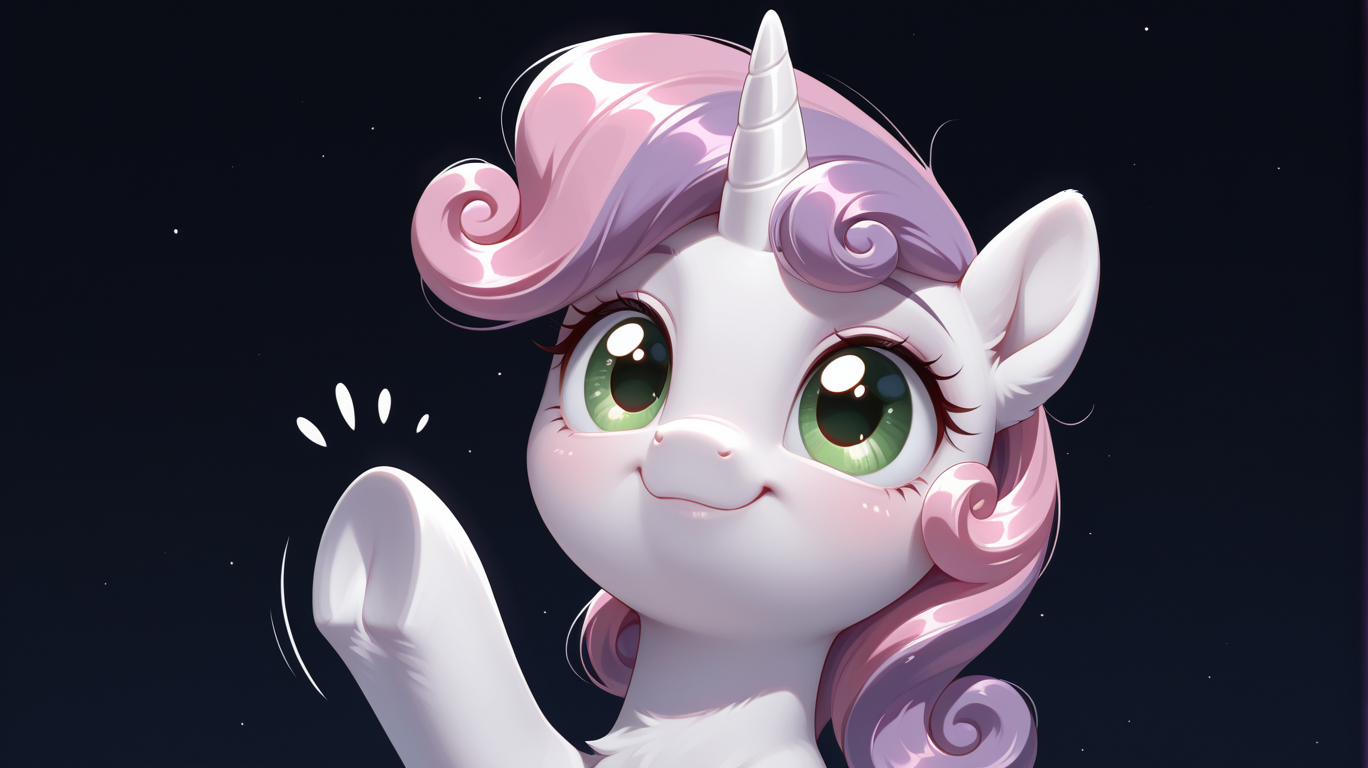
Okay, the general idea is there, but not quite right. And now the hard truth, ponyv6 is a little outdated as is the tpony model I used here. So I exchanged the quality words to fit a popular illustrious model and got this:
Better, but still off. I want Fluttershy to look at the viewer so we add
looking at viewer and try again. Or better you can try. Happy prompting!Interlude
We already talked about photo editing software. Another thing you can do that doesn’t require learning or skill is making small edits with the “band-aid-tool”. It is a tool that looks around a marked area and tries to guess the content of said area. I made a video of this on action a little while ago where I use it to remove ghost signatures:
That said, it can do far more than just that. I find it way easier to remove smaller mistakes the same way. Knowing your tools and the options they provide is a valuable skill on its own, so try around!
Chapter 7 - Avoiding mistakes like therapy_
Let’s get a bit more focused on ponies and the most common source of error at this point in time: Wings!
Face it, wings are among the hardest part to get right. There are a lot of “good” pegasi or alicorn pictures
on Tantabus, but even those have flaws in the wings. And I’m not talking about the plumage, I’m talking positioning.
Face it, wings are among the hardest part to get right. There are a lot of “good” pegasi or alicorn pictures
on Tantabus, but even those have flaws in the wings. And I’m not talking about the plumage, I’m talking positioning.
Here some of my own “bad” examples:


Cadance right wing standing up like that just looks a little weird, like she wants Flurry to smell her wingpit. Twilights boils down to one wing doesn’t match the angle of the other. Her right wing should point more directly at the viewer to match the left, or her left wing should point further back. Either way, the are not symmetrical, and the right wing doesn’t really looks attached to her side. That in itself doesn’t make the pictures bad, but it takes away from them (in my opinion).
So how do we fix that mistake? And here comes the good part: We don’t! At least not directly. I just recently started doing this myself and it made my life easier.


In both of the pictures above, Fluttershy was generated without wings. I added them later from a library of “good” examples of wing positions. In the left one, it was even only one wing I mirrored in photopea. So whats the process here:
First we generate the pony we want without wings. That is done, most of the time, by leaving
First we generate the pony we want without wings. That is done, most of the time, by leaving
pegasus, bat pony, alicorn, winged unicorn out of your prompt and/or adding wings to the negative. (For ponies mid flight just use floating, flying, in the air regardless). Next would be sourcing a good pair of wings. Either you use a generated image from your own library or look one up on the internet. Don’t worry about style or shading, inpainting will fix that. If you have those, just clap them on in a photo editing software of your choice and inpaint the result (0.4 should do it).This is a bit more involved on the editing part thou. You would need to cut out and mask the result into another picture. But I think it is worth it. It also helps around another common mistake AI likes to make: Barrelwings! Or wings that grow from the barrel instead of the upper shoulder, low withers:
What started this little idea was this picture:

Getting folded wings on an anthro pony was near impossible. The AI just wouldn’t do it. (Probably because it doesn’t know how). So I borrowed the wings from a pony Fluttershy, elongated them and fit them onto her anthro self here. The wing mostly obscured by her body was once fully there, but that what masking is for after all. The tldr of this is, sometimes taking the extra time is worth it to get a 99% good pic to 99.5%! Could also just be my own OCD…
Chapter 8 - Freedom of Choice_
To continue our theme of basics, lets talk about the choice of model. For this, you need a basic understanding how they function in general. Basically, we have only few “real” models. Stuff like NoobAI, Illustrious, Stable Diffusion, Chroma, etc… Training these base models take real resources and people wouldn’t pop out new ones every other week if we would be talking about these. What we use, local or in the cloud, are the checkpoints. Checkpoints are basically these base models with baked in Loras, either for style or character knowledge. So by choosing the right checkpoint, we choose the “base” for the images we want to make. We can add even more loras, of course, but by choosing a good model we can leave out style loras for example. I only worked with SD1.5/SDXL, Illustrious and NoobAI checkpoints, so I can only talk about those.
But instead of ranting like a mad villain for nearly an hour, I just want to recommend some models I think people should take a closer look at, especially in a timeline where PonyV7 is hot garbage:
- WAI-Illustrious-SDXL is one of the most famous models and used all over. It knows a lot of characters and concepts. But it mostly anime in style. I tried for days to get a comic like look out of it and it required like 5 loras to do so (I tried via prompt first of course, no dice). 5 loras just to change the style? Thats a bit much. It also lacks pony knowledge. It knows the Mane6 okay, Princess Celestia and Luna somewhat and nothing about Cadance beyond that she is pink. More specific anatomical details are also a no go. But that is expected from a model that is as general as this. So you need loras for those details.

- Hassaku XL is also quite famous. But unlike WAI, it is more flexible in style and knows ponies better. Version 3.2 even gets the Cutie Marks of the Main6 near perfect and it has good knowledge about concepts. The drawback here is to control it. Prompting with this checkpoint is a task in its own and you will need a lot of trial and error to get it do what you want. I also notice that it likes blur, very much so. So that’s something to look out for.
Now with two high profile models out of the way, lets talk about more underdog checkpoints (and personal favorites):
- Plant Milk Walnut has a weird name, and is a weird model, but can deliver impressive results. It’s even more random than Hassaku, but if something good pops out, its really good. It needs loras to get the ponies right, but then it rocks.

- Hyphoria is the exact opposite of Walnut or Hassaku. It is easy to control, since it was made to adhere to the prompt very strictly. You need to be really detailed with your prompt to get things right, but that is also it biggest strength. It knows ponies to the point of needing no lora for the main6 or the princesses and not even one for more explicit details. It is very open in style and just a blast to work with once you get the hang of it.

Interlude
Since I talked about models and checkpoints, I should also mention software. But the truth is, I only ever used two so far. I started out with comfy and while a little complex, it helped me greatly to learn about the process of generating images. Then I was told to try invoke and I never left. So I can only recommend those two. Both have advantages, but if you are not a power user with some basic computer knowledge, invoke is a one click install these days that works on NVIDIA or even your CPU. So if you have at least a 2060, I would urge you to try invoke. Siber made a nice video showcasing some of it’s capabilities:
Chapter 9 - The final resolution_
A new year has begun and I bet most of you had made some resolutions. Just don’t forget to cancel that gym membership next month. Anyway, lets talk about image sizes. Because size matters, regardless what some might say. Models are trained on images and some resolutions are more used than others. There is a reason most generated images are in a 3:4 aspect ratio or similar.
If you look at the two images closer, you will notice the discoloration at the right. These are artifacts that happen because the model doesn’t like the resolution I used. In this case 1368x768. Using 1280x720 we don’t get these:
Instead we get a grey border at the bottom, the second type. Both can be avoided and removed. We established that I like avoiding problems more than solving them (way easier) and thus I, for example, generate at 1344x768 and after upscaling I cut the image to 1440p. Why not generate at 1440p? Two reason:
- My computer would melt.
- The bigger the image, the more mistakes sneak in.
Our models are simply not trained in such high resolutions and they fill the blanks with weird shit. Think a pony with the body proportions of a dachshund. So it makes sense to think beforehand at what resolution I want the final image shall be and start with half or even a quarter of that (for like 4k and stuff). Then try around until you find a resolution that works for your model. Often recommended resolutions are in the description of the model.
But lets say you have a very nice pic with one of these artifacts, how to get rid of them? Well, there are two solutions. One would see you use Krita/Photoshop/Photopea etc..
You can carefully edit the border with the same tool I use here to remove the ghost signature:
The other method is inpainting the image in a 1:1 resolution. Mask out the area and let it rip. If you have the first kind of artifact, just go at 768x768, mask the area and denoise at 0.3-0.4. Should fix it right up. Of you have the grey border use 720x720 (use the shorter side at 1:1 basically) and do it three times. One for the left half, one for the right and then blend them together in the middle. This should get it.
Chapter 10 - You spin me right round_
This will be a short, but a powerful one. As the title suggest its about rotating stuff. In this case, the pictures you make. And flipping too, by the way. Artist use flipping the images for decades. Sometimes, when you stare too long at the same thing, you get blind for errors. Some people take a break and come back later with a fresh perspective, other just flip the image vertically. This makes your brain reassess the pic and you spot weird errors easy again. That can be done in some AI-GUI’s, but also on most operating systems default image viewer. Try it out, it helps.
But the more important part, the AI part this thread is about, comes from rotating pictures. Let me explain why. Imagine you want to train an AI and you want it to learn what a tree is. You show it 10 pictures. 7 of trees with leafs and 3 pine trees. Now if you prompt tree, most of the time you will get a leaf tree. And then you want it to grow upside down from a cloud and the result is a total mess. Because all 10 pictures where of trees the right way up. The AI can’t flip concepts in its head. It only draws things how it was trained to draw them. The way they were in the training data.
And that’s where rotating comes in. Lets imagine our image with a gnarly wrong looking tree that grows down from a cloud. We can fix that. We rotate the picture, until the tree is upright and then inpaint the tree. The AI now, since it knows upright trees, will draw the tree the correct way. And when its done inpainting, we just flip the image back to the original rotation. (Masking the tree is implied, so you don’t inpaint everything.)
It’s stupid, its simple, but it works miracles for rare edge cases.


